Are you bored by a ready-made paracord dog leash?
Looking for some experimental handmade leash? Don’t worry we will give you 3 ways to make a paracord dog leash using cobra stitch for you.
You have to read instructions carefully because sometimes a few steps can be very tricky. We have covered the basic paracord, two-colored, and 4 strands paracord dog leash exclusively for you.

How to make a DIY Paracord dog Leash Using Cobra Stitch?
In this guide we have shared with you 3 amazing ways to make a paracord dog leash using cobra stitch. Follow the steps given below and gift your dog a beautiful paracord dog leash.
These leash ideas are great because they will not rot or corrode.
DIY Trick 1: How to make a paracord dog leash?
Step 1: Get paracord threads
This is all the materials that you will need to make this paracord dog leash.
Depending on the length you want, you have to get a paracord for you. For a basic cobra stitch, you need a foot of a cord for each inch of the stitch, minus the core that means that for a single braided piece of paracord you will require a foot-long. For instance, if we take 14 feet of string then we will be able to have 12 feet for the definite braid and 2 feet for the center.
Keep a minimum of 1 feet additional on the safe side to make a paracord dog leash!
Step 2: Cobra and King Cobra Pattern
We have to make a cobra pattern. First, there just be a core, and the core will lead to how your braid will be. The initial step is to search for the center of the cord, and then compute the required length of the cord. Now hitch knot it to whatever you are trying to like the end of the leash.
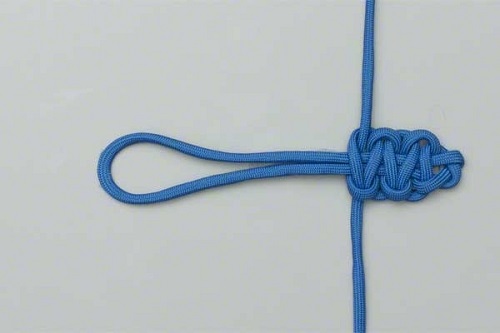
Take one end of the strand and place it over the core. Meanwhile, leave a slight loop. Hold the other section and go over the primary piece, however now under the center and up through the circle.
Repeat the steps but keep in mind to switch every time.
And, to make king cobra you just have to double back over the cobra by using it as the core which gives it extra strength and size.
Read More: Teach a Puppy to Walk on a Leash | Train an Older Dog to Walk on a Leash | Train Your Dog to Walk Without a Leash
Step 3: Collect tools
To make a paracord dog leash, you need a pair of scissors, clip tape, a lighter, and a measuring tape.
Step 4: Tying the Knots
At this point, start the leash with a regular hitch knot. Wrap once around and through if you want to add the width you just have to wrap extra.
Tip: You can tie a section of scrap cord at the end of the hitch to make it sturdy.
Step 5: Managing the cord
Read carefully: This is the trickiest part.
After hitching the cord onto the clip, measure the desired length. You can make a coil along with the cord for the handle. Once the loop is ready, you need to create the handle. In order to do so, you need to take 2 braided strands, then begin braiding both of them at the bottom.
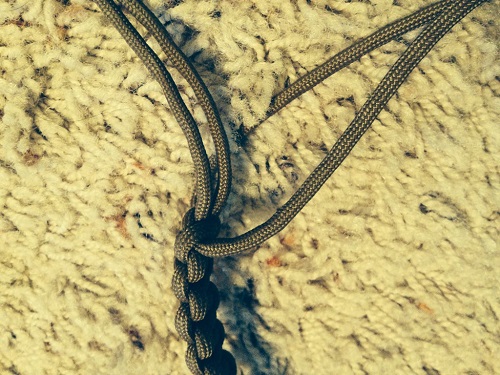
Now with this, your handle is safe for the rest of braiding. After the “core jump,” you just have to do a cobra stitch around the first handle. It is a vital step when you return with the king cobra stitch
Step 6: Completing the first step of handle
After you have braided at the handle you need to return to the actual core. Which could be about 5 to 6 feet lengthy. Now do the “core jump” back to the lengthy section by providing it a smooth loop in the braid.
This step builds the unification in the capacity of the leash. The leash is made of a strong solid part of paracord which makes it very durable and long-lasting.
Step 7: It’s Braiding time
Once the handle is done. The only thing remaining is to braid the cord front and back. Now you can notice how the handle is prepared. Keep in mind that we are returning over it all. We will make it more pretty.
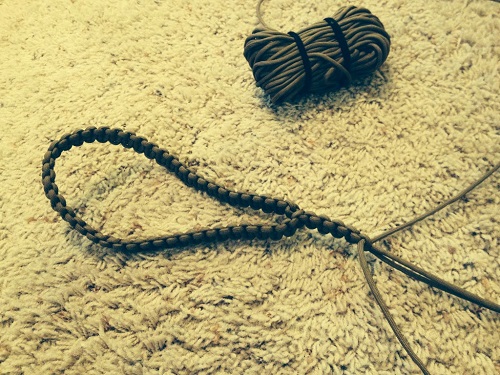
When you reach near at the end, it is advisable to braid nearer to the clip. Keep it wide as much as possible so when we back twice and make the king cobra it will be easy close to even. This section is simple, and you are halfway done! Yikes!
Step 8: The King Cobra
This is simple! You can do this!
After braiding up to the clip as wide. You have to take a spin over and use the initial cobra stitch as the center. You have to go closer to the clip as much as you can so that it can guard those connections and won’t let the leash twist and swirl.
After the turns keep on braiding all the way back up.
Step 9: The last stitch
After braiding way back up to where the handle starts to form. Now it’s the time to get the things done!
At this stage, you can select a side of the handle to mesh and can go all around. Once you reach the lengthy section of the leash where it starts, now you need to trim and burn the endings. Make sure that you have pulled that thing tight, only then cut it.
Just ensure the ends don’t slip.
Read More: Ways to Hold a Dog Leash | Stop Dog from Pulling on a Leash | Train a Dog to Walk on a Leash Beside You
DIY Trick 2: How to make a paracord dog leash using two-coloured cobras?
Step 1 Gather the tools
To make a paracord dog leash using two colored cobras, you have to get paracord of 2 different colors of your choice. A lighter color for burning the ends, a cutting tool, a snap for the end of the leash, and a haemostat.
Step 2: Snap and Cow Hitch
First, cut the cord into the size you wish. Make snap and cow botch hitch cord to it. Now try adjusting the cord in the center two to the extent of leash you want involving the handle.
Step 3: Right Placing
Place the rightmost cord under the middle two with it and move over the left.
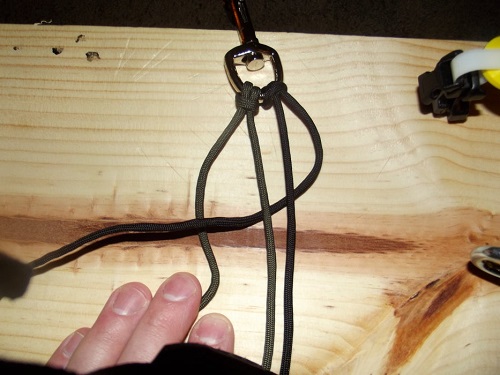
Step 4: Start weaving
Now place the opposite cord up and the mid-two. Now through the loop created by the previous step start making your knots tighten and pull them towards the snap.
Keep going till you get the length you wish. Remember to include your handle on the end because it will be doubling back on it.
Step 5: Use haemostat
It is now time to use the hemostat. When you get a length of your size now loop the knot back to itself. You can take the center two ropes and drag that through the center piece of the Solomon bar utilizing a hemostat where you can proceed towards the snap with a similar bunch.
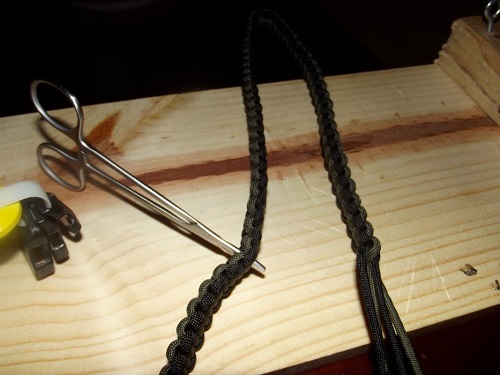
Step 6: Make it a bit stronger
After drawing the center cord with haemostat carry on weaving over the top. This will make your handle stronger.
Step 7: Cut and burn the cords
Keep on with the knot from the middle of the two cords for approx 4 inches. Cut and burn the ends.
Step 8: Handling the loop
Right after weaving the middle two to the snap take the other two ends and keep on weaving on the handle loop till you get the right fitting.
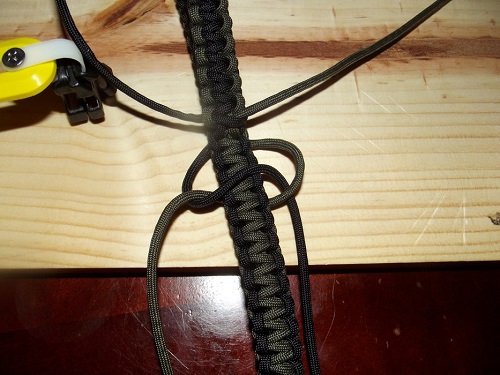
Step 9: It’s the end
Cut the paracord with the help of a cutting device and burn it with the lighter. And, the task is done here.
Note: Find Out How to Get a Stubborn Dog to Walk On a Leash?
Continue Scrolling! There is one more! The next one is perfect for outdoor use!
DIY Trick 3: How to make a paracord dog leash of four-strand?
Yes, Paracord Dog Leash is possible to make with four-strand.
Step 1 : Assemble tools
To make a paracord dog leash of four-strand, you will require 2 haemostat clamps, a pair of scissors, a C-clamp, a small wood-burning tool, a snap, a paracord, and a measuring tape.
Preshrink the paracord soak in hot water and let it dry. To decide the length of the cord cut down the length of your project into inches. Later increase it by 4 times. For instance, if you take 65″ then 65″x 4 = 260″. You have to take 2 individual paracord of size 260″ long.
Step 2: Arrange the Paracord Strands
Take 4 different color cords and interweave the strands together. Now utilize the c-clamp to attach the snap. To keep it steady to snap to a tabletop. Put down the two pieces of paracord abreast above the ring of the snap.
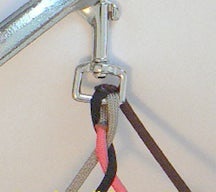
Step 3: Weaving Move One
Take the cords in both of your hands. Put some light tension on all the stands equally. Cross Pink Cord (C1) over Tan cord (C2). Now take the Black cord (C3) which will go to the outer left and the brown cord (C4) to the outside right.
Step 4: Knitting Move Two
Now, take the third cord behind the C2 and then cross over the C1
Step 5: Braid with three moves
Now you have to cross the fourth cord that is C4 behind the braid and then cross it over the C3. Cross the C2 behind the braid and cross it over the C4. You have to keep increasing the braid that with each strand of paracord above all the remaining strands.
Step 6: Use Haemostat Clamp
Now use one hemostat clamps to clamp off the ends but make sure you cut off the C4. It is the next cord that needs to be a braid.
Step 7: Scaling the Braid
You have to measure 5″ from the end of the braid then double up the cord over. Observe the braid and check where the C4 stands cross the braid and poke the haemostat though.
Now open the haemostat and try gripping the C4 cord and clamp the haemostat closed. Pull the C4 strand all through the braid.
Step 8: Back to Weaving with two moves
Remove the haemostat clamp that has secured the bottom of the braid. Keep C1 strand, and crossing close to C4. Now poke the haemostat again. Now grasp the C1 cord clamp the haemostat and then draw the C1 cord all through it.
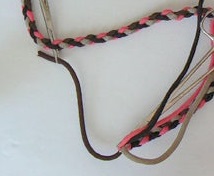
Step 9: Back to Braiding the cords with three moves.
Place the C2 strand that passes to the braid and repeat step 7 again.
Step 10: Redo braiding with four moves
It is the ultimate step to place the C3 strand and make it pass through the braid. Redo step 7
Step 11: Complete back braiding
It’s time to make the handle. While making the handle make sure it is stabilized by further back braiding. Now you have to redo step 7 and step 10 to three to four times, so you can get a sturdy back braid.
Step 12: Cut the losses ends
Finish the ends correctly. Take the scissors and cut the cords. Now close the braid. Drag the wood burner and let it heat for a few minutes.
Step 13: Melt, melt, and melt
Melt the cord with a wood burner over the cut cord moving it in a sweeping motion. Before you switch the cords please make sure to wipe the tip of the burned tip over the damn scrap cloth to clean it.
Step 14: Enclose the melted cords
Once it is done you can see the melted cord will match seamlessly into the cord below. It is a little tricky and needs some practice so don’t panic.
Step 15: Your Ultimate Leash!
Well, now your hard work pays off! Wash your leash once before using it, and it is all set for use. Your fancy 4-strands cobra leash.
Read More: Find out How to Make a Dog Leash Out of Climbing Rope? You can also try DIY dog leashes: custom ideas with tutorials by yourself as well. Try it once, they all are fantastic and easy to make.
Wrap Up!
The paracord dog leash that’s available in the market is not that strong and cannot handle the wear and tear. Sometimes it won’t last for even 1 week. So, you can make a paracord leash for your pooch at home. The process of making a paracord dog leash is simple, once you start doing it.
There are various types of paracord leash in the market we have covered 3 different types of the basic cobra paracord leash, two colored cobra stitch leashes, and 4 strands leash for your dog. Now it’s your turn to begin the DIY process.
Let us know, which was your favorite leash idea.
If you have more related ideas on how to make a paracord dog leash than we would like to know more about it. Do comment!
Also Read:
- How to Deal with Off-Leash Dogs?
- What Is The Least Effective Method To Retrieve A Dog That Has Got Off-Leash?
References:
- How to Make Your Own Dog Leash – Outside
- Is Your Dog’s Collar Dangerous? – Peta
- Dog Safety Leash Market – Transparency Market Research

Kathryn is a certified animal behaviorist, dog trainer, and a proud parent of four dogs. Having dealt with hyper-active dogs herself, she certainly knows what will work best for your canines. Moreover, her love for pets drives her to get the most reliable products in the market!

